
Creating a static private network on VMWare Fusion with Ubuntu
This tutorial is using VMWare Fusion 7, Ubuntu 14.04.1 server and OSX 10.9
The goal here is to create a private network shared with selected VMs and the host, while offering NATing to connect to the Internet. VMWare offers some documentation, which works great with DHCP, but I needed to specify everything static for custom needs.
Creating a private network
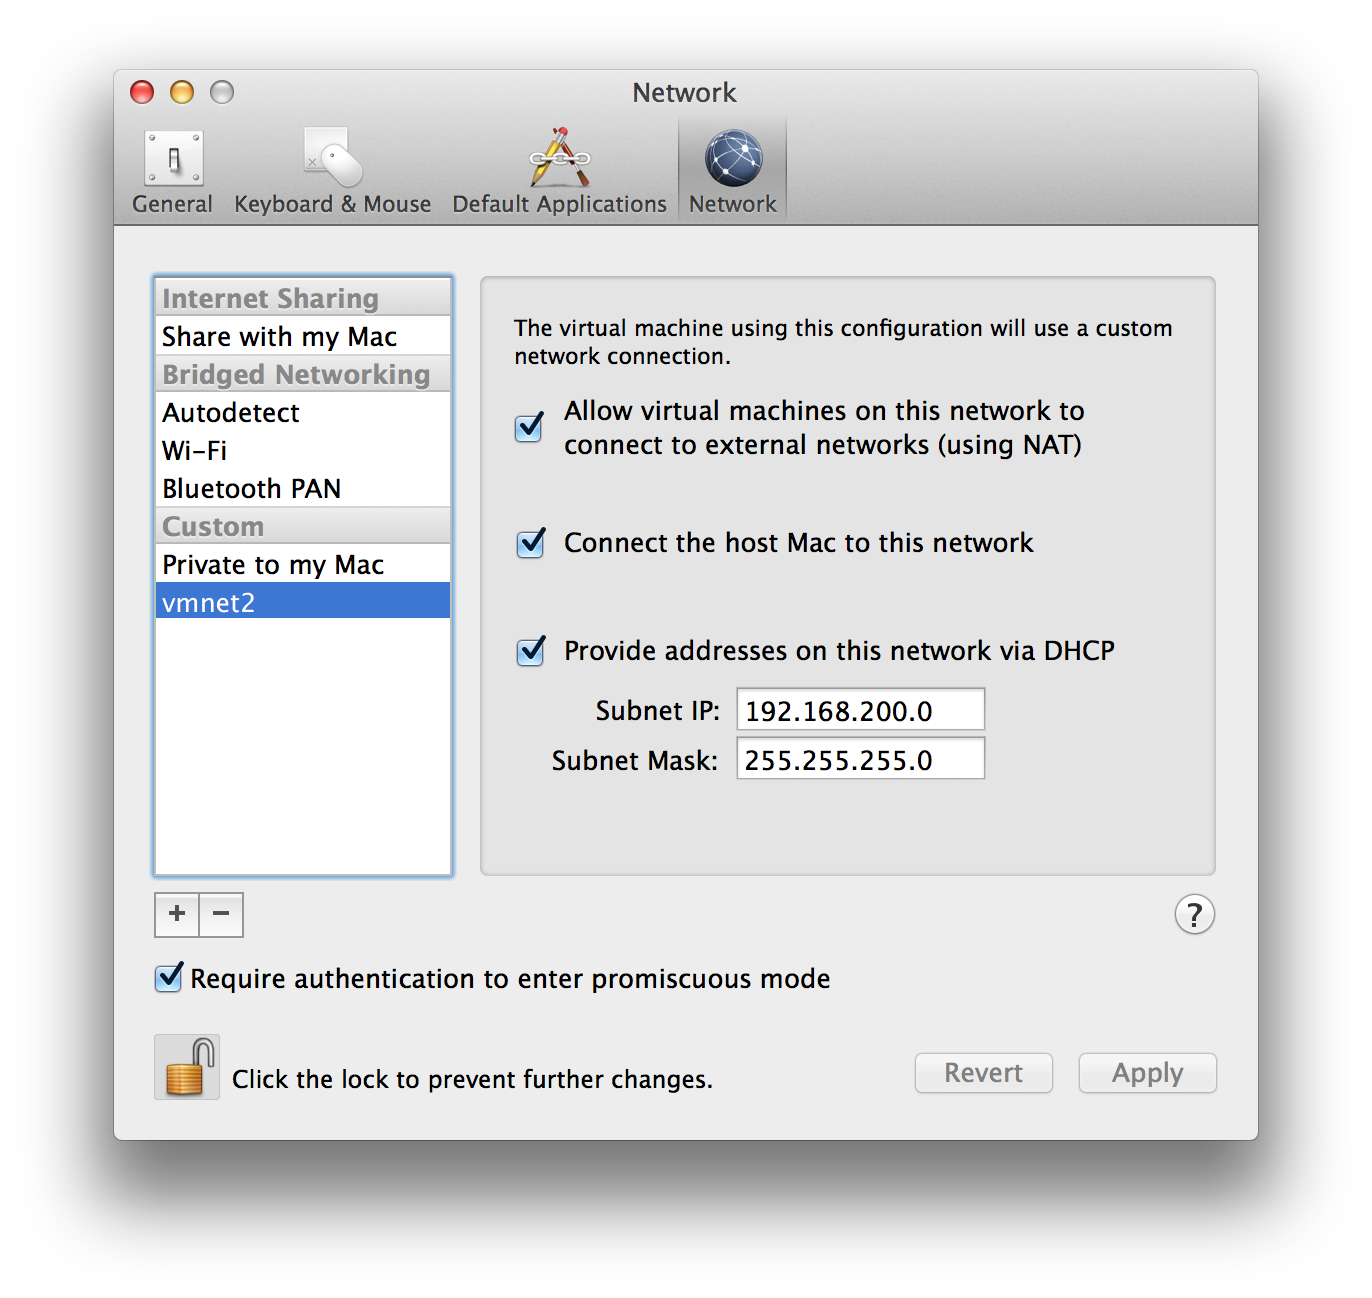
- Go to the Network tab of general settings (⌘,)
- Unlock the screen by clicking on the lock.
- Add a custom network by clicking on the +.
- Make sure all options are checked (see screenshot).
- Specify a subnet IP, I will be using 192.168.200.0. Activating the DHCP here is needed for the host to connect to it, even though our VMs will be using static IPs.
Configure the VM’s network adapter
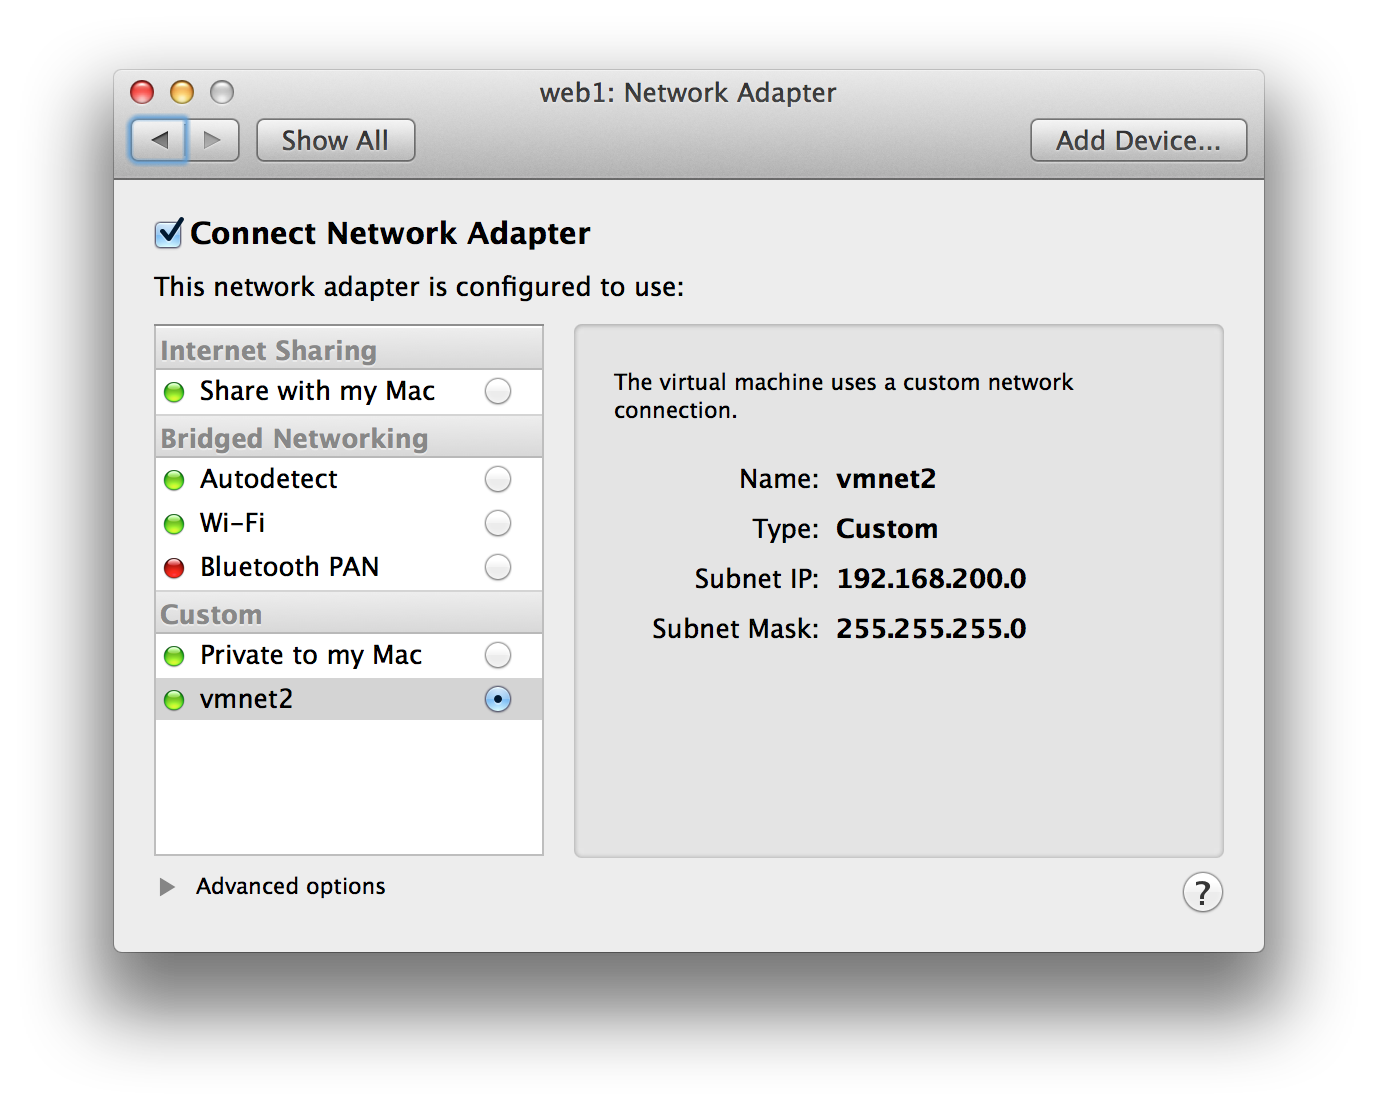
- Make sure your VM is powered off.
- Go to the VM’s settings (⌘E)
- Click on Network Adapter.
- Select your newly created network (for me it was
vmnet2).
Configure the OS’s network adapter
- Edit the network interfaces:
$ sudo nano /etc/network/interfaces # The loopback network interface auto lo iface lo inet loopback # The primary network interface auto eth0 iface eth0 inet static address 192.168.200.100 netmask 255.255.255.0 gateway 192.168.200.2 dns-nameservers 192.168.200.2 - Reboot
- Check to see if Internet works:
ping google.com - Check to see if you can see your host:
ping 192.168.200.1 - Try SSHing to your VM from your host:
ssh 192.168.200.100
You can add more VMs to this private network, just remember to change the IP from 192.168.200.100 to something else from 192.168.200.3 to 192.168.200.253.